
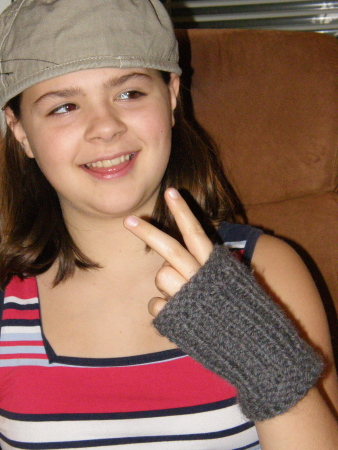
Not to be left out of the mitt giving fun…Megan needed a pair of her own (poor thing had only been asking for them for about a year, but I didn’t have the chance to get to them before now!) I made them on the sly, right in plain sight…when she’d ask what I was working on, I’d vaguely say, “oh, I have a class coming up…” 😉 So sneaky! I even measured her hand by quickly holding the knitting tool up to it while we were talking, & taking note of where on the tool I wanted the mitts to end on her wrist! I love doing sneaky surprises accomplished right out in the open…it makes the end result so much more fun, because then the whole thing turns into a little joke about how they didn’t know what was going on right in front of their nose. 🙂
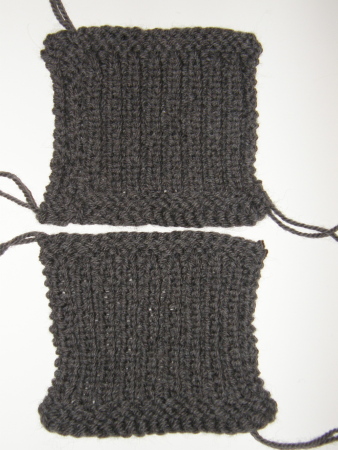
Well, because this was a project on the sly…I realized I misjudged the width needed for the first panel. I was about 2 pegs short on the Knifty Knitter blue loom. I reeeeeeeaaaalllly didn’t want to go froggin’, so I did a little fix…
Megan is 11 years old, so the mitts needed to be narrower than a full round on the blue KK loom.
I used 18 pegs on the first, then realized I really needed 20, which is what the bottom swatch is.
Pattern: (for those interested) 😉
*Basic Chain Cast on (20 pegs) using 2 strands WW held as one.
*Rows 1-4: fine gauge (not e-wrap) garter stitch: knit one row, purl one row…repeat.
*Rows 5-28: basic fine gauge ribbing…K1, P1, K1, P1…repeat all pegs, all rows, keeping knits above knits, and purls above purls. *note: this number of rows may need to be adjusted for wrist/hand length!
*Rows 29-31: fine gauge garter stitch beginning with purl one row…
*Row 32: e-wrap knit all pegs
*Basic Bind off.
To fix my width error…I just knitted up another skinny panel of 3 pegs in the same pattern as above. (I used 3 pegs, rather than the 2 I was short to allow room for seaming.)
~Wah-lah!!! Equal sides! 🙂
*Final Step: Stitch sides together, leaving 4 rows open for the thumb holes.
**Too Cool!
Happy Friday! 😀
Bethany~


TA TAAAAAAA!!!
ok i have a question
when you only cast on 20 pegs, how do you so that because i tried and it look terrible do you just skip a few or something please help!=D
Pingback: Knitting Fingerless Gloves - Easy Patterns | Spinning Alpaca Yarns
Hi,
I think your mittens are very cute, my daughter would love them. I am pretty much a beginner (I’ve made a lot of hats…lol) but I want to start doing other things because I am getting quite bored. My question is, how do you stitch them together. Do you use yarn and a yarn needle? What stitch do you use.
Thanks for your help and thanks for your site 🙂
Hi Megan! 🙂 I’m so excited that you’re ready to move beyond the basics and try some new things out on the looms! These “Mitts for Megan” sound like the perfect thing for you to try, lol. 😉
In answer to your question about seaming…Isela Phelps has already answered this question quite thoroughly here: http://isela.typepad.com/looming_crafts/2006/11/loomy_q_a_seami.html
I hope you enjoy! Let me know how those mitts turn out… I always love new photos to display on the Clique Pics page!
Bethany~
Pingback: Wrapping up a great year :) | Gettin' It Pegged…Loom Knitter's Clique
I found this recently to do for my daughter and i love it. I could not find a fine gauge cast on (at least I think it’s a cast on). I did do it with just e-wrap but I would really like to know what the fine guage is.
Hi Sheryl! 🙂
I’m so glad you’re enjoying this simple-yet-successful project…it’s a great way to whip out fingerless mitts in a hurry on your looms!
As for the “fine gauge method cast on”…this was an early term of mine to differentiate between the e-wrap co and the other ways available to create a smaller, non-loopy cast on edge. Some great ones available are the: crochet, chain & cable cast on.
You can find the crochet and the cable co’s at my site here: https://gettinitpegged.com/twisted-stitches/ (view “Mystery Loom Along 2” for the Crochet CO and scroll down for the pictorial file of the Cable CO)
and you can see the chain co (sometimes also referred to as the crochet co as well, as in this case) here: http://www.onetruemedia.com/otm_site/view_shared?p=2dd593cb0e9e210b389837
Hope this helps! 🙂
Bethany~
Pingback: …a look back through 2011 at Gettin’ It Pegged~ | Gettin' It Pegged…Loom Knitter's Clique
are there any videos on how to do a fine gauge stitch on the knifty knitter circle loom? i want to make these type of fingerless gloves, but i am confused on how to do this as i probably only know the e-wrap stitch (ive only made hats with the circle loom)
nevermind. found some videos on youtube to distinguish the knit and purl stitch
now to find basic knit cast on for these gloves
Oh Renee, I’m so glad you found where to go to determine what stitches to use! 🙂 If you head to the Twisted Stitches page of this site, you’ll find a couple articles which detail and compare the most used cast ons and bind offs available for loom knitting today…this should get your looms whizzing with action and mitts on your hands in no time! 🙂
Bethany~